Showing posts with label HOWTO. Show all posts

How to download Facebook Paper still outside U.S.


Last week, the popular social network announced "Paper" , an app for iOS that displays a simple and friendly way the stories shared your community. And starting Monday, the same is already available but, for some strange reason, only to North America.


However, the good news is that the restriction is easily overcome. Next, we explain how to get Paper Facebook even outside U.S.

Before you go: Please note that to change the country or region where your data will delete any information of card of credit stored in iTunes. So make sure you have the data at hand and then enter them again.

Step by step:

  • Open the App Store from your iOS device and on the homepage go to the bottom where you'll find the email you registered on the service. Click the button.
  • When the menu is displayed, select the "View Apple ID."
  • After entering your password you will see your data, where you must select the country and region where you currently reside. Click on that option and the new menu select " Change country or region. " Must choose America.
  • Accept the Terms and Conditions, after which Apple prompts you to enter a payment method. Since the Facebook app is free, you can choose not to enter payment details.
  • Ends the change and return to the home page where you will see the available applications App Store U.S.. "Paper" is in the first section under "Best New Apps".
  • Paper Once you download, you can go back to change the data following the same steps. Simple, right?

And just as it is needed, here is the direct link to the application . Luck!
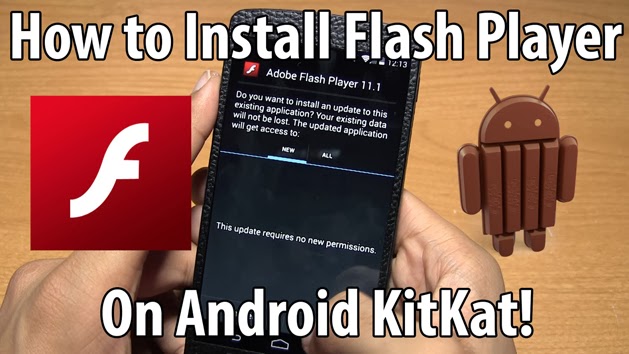
How to have Flash Player on Android 4.4 Kit Kat


How to install Flash Player on Android 4.4 Kit Kat

Adobe Flash Player removed from Android Ice Cream Sandwich. In Android 4.4, the plugin does not work well, but as always, someone in the Android community was able to find a solution to have a functional Flash Player to the latest version of Google .


The downside is that you can only have Flash Player running through the Dolphin browser. Anyway, it's better than nothing.

How to have Flash Player on Android 4.4 Kit Kat

To do this:

1 - Enter the Play Store and download the Dolphin browser on your Android device.

2 - Join Dolphin and go to the Settings menu by clicking on the logo transparent Dolphin in the lower left and select the first icon on the right.

3 - Click on Settings in the menu that appears.

4 - Go to "Web Content" and select Flash Player that is "always turned on".

5 - Finally, download the APK and installed on your Android device changed.

This file does not require permission, so do not worry that your information is stolen. You can confirm whether it works or not Flash Player on your device entering the Flash Player page on the Dolphin browser.

Now you will be able to browse your pages with Flash on Android by Dolphin without problems . Note that Flash requires a good processor, so if you have a low-end Android, the experience will not be as pleasant.

How to install any Games & Apps on Chinese Mobiles


Hello everyone, this is already our third post hacerca Chinese mobile games or games like putting on a Chinese Mobile . Certainly you must have someone serve our previous post, but some not.


In the discussion that was generated in the post games for chinese phone, I found a very good contribution made by Kike RIOS, a visitor to our blog who gave us a solution that apparently it has worked for many of our users. Below step detail, the moment I do not own any catch since I have not a Chinese mobile to capture (if someone does please feel free to send screenshots to rinse the post), the steps are as follows :

1. Download the following ZIP file and unzip
2. The SD OF CHINA FOR MOBILE folder contains the following folders, as shown in the following image:


3. Replace these folders on the SD Chinese cell, its SD memory had these folders, simply Let them create.

4. Restart the phone and type the following code: * # 66 * # , wait for a window, in that window you head out to where it says ECHO LOOP OR CYCLE ECO pressed key or turn ON (green button).

5. Out of the Ca pressing the logout button or cancel call.

6. Enter the following code: * # 220807 #. Done.

If the Chinese phone supports NES games, rest assured that the NES games appear in the SD. The games folder on the SD memory Mytrhoad / NES.

We hope this new tutorial serve them, are all supposed to learn from all this is a community, seek to have it be so, let's go! try all the tutorials, if they work do not forget to comment here so that everyone has the experience, if it did not work, let's discuss it like make and model of mobile to find out which makes you and which are not.

We expect them to behave when commenting, if I see any comments that do not benefit anyone will be deleted immediately, suffice to say that all comments have a huge folder, so are spent not writing swearing or insults, which never appear.

Remember that if this article helped you, help sharing it with friends on social networks, thanks.

How To Jailbreak iPhone 4,4s,5,5s and 5c with iOS 7-Evasi0n7


  • Perform Jailbreak quickly and easily to your iPhone compatible with iOS 7.
  • Evasi0n7 is the best tool to untethered jailbreak your iPhone.

How to Jailbreak all iPhone models compatible with the new iOS 7 -  Evasi0n

New Jailbreak for iOS 7 is here and thank the Evasi0n 7 tool ,to Jailbreak your iPhone is easier than ever. As we warned over yesterday, maybe most Cydia tweaks and features not presently optimized for iOS 7, but imagine that soon this problem will be solved.

If you already have your iPhone on hand and eager to perform Jailbreak your device, we shall only get down to work.

What should I know before Jailbreak my iPhone?

It is untethered Jailbreak. Which means? Roughly the Jailbreak will not disappear when turned off or reboot the device, nor will need to connect it to your computer every time you turn on the iPhone. If you want to know more, we have a great section on Jailbreak .It is highly unlikely that our iPhone runs a real risk of breaking completely, but we can deal with data loss. Therefore, it is highly recommended to perform a backup on iTunes and iCloud.


Evasi0n7 is compatible with the following versions of iOS7 ,so make sure you have installed on your iPhone: 7.0, 7.0.1, 7.0.2, 7.0.3, 7.0.4 and beta 1 and 2 of iOS 7.1.Being a newly released Jailbreak, you may find many errors / inconsistencies .Before Jailbreak you should disable the access code if you have it enabled.

What iPhone are compatible with iOS Jailbreak 7?


  • iPhone 4
  • iPhone 4s
  • iPhone 5
  • iPhone 5c
  • iPhone 5s

What do I need to Jailbreak my iPhone?

1. An iPhone compatible with iOS 7 and Evasi0n7 tool (You can view the list).
2. A computer operating system Windows or OS X.
3. A data cable to connect it.
4. The Evasi0n7 tool. »For Windows  »For Mac 

Steps to untethered Jailbreak to your iPhone iOS 7

1 - The first thing to do download the Evasi0n7 tool  links that i have left in the previous section. Try to choose the one that belongs to your operating system. Once downloaded, extract it.

2 - The following is connect your iPhone via the data cable. Once Evasi0n7 detects the "Jailbreak" button will be activated and we will release it. We should not worry about putting it in DFU mode, the application will do it for us.

3 - After a few minutes, we see that our iPhone is restarted several times. This is very important not to touch or unlock your device in any course.


4 - After several reboots and once the transfer is successful, we will see a new application on our home screen. It is "Evasi0n" and we open it to finish to complete the process.

5 -. When the process is complete, we will see that the old application has disappeared and in its place we have . Cydia We're done!

As you have seen, the process is extremely simple and does not require more than a few minutes to have our unthetered our iPhone Jailbreak iOS 7

How to convert Normal SIM card into Micro/Nano Sim-Easy Steps


Today we talking about very useful information about convert normal SIM to Micro sim in Three Easy Steps.

Here is a very nice trick and it definitely works to convert at a time when our normal SIM into a micro SIM .

Cutting our SIM to make it microSIM

1. The first thing to do is get a good cutting tool,either scissors or a cutter. It is important to make clean cuts to avoid problems later. We also need a rule (if a bit heavy use cutter for card not move while cut).

2. Then we have a workforce of us a microSIM or its action on normal SIM . We will have two options:

a. Measure with the ruler to make the cuts (this is what I have used and works perfectly), marking with a permanent marker and fine according to the measurements that you find in the image below .Keep in mind that not all SIM are identical, but what always equals the size of the microSIM, so you simply adaptรกis card that size. There are even models that are short of the rectangle occupied by the circuit to make the conversion.


b. Print the template in 1:1 size.Here you have a link to download the template, which also carries the cutting instructions.

3. then we just have to try to insert the card, if we do not try to go a little more cut and ready . In just 10 minutes you will have your SIM list.

Install CM11,Paranoid,OmniRom on Android Smartphone/Tablet


This time we'll talk about CyanogenMod, OmniRom and Paranoid Android, custom roms that are based on the source code that Google sends to AOSP project.

CyanogenMod

One of the most popular, famous and expected at the scene,CyanogenMod is one of the changes that have longer hovering on the scene and has more versions. While the ease of installation is a major advantage that has this modification between Roms Android has a lot of features that makes it one of the best, especially in that squeeze the most power of smartphones and tablets are installed.

  • Support for native threads.
  • Support audio codec FLAC.
  • Long list of Access Point Name.
  • OpenVPN client.
  • Menu reboot improved.
  • Support for Wi-Fi, Bluetooth and USB thetering.
  • CPU overclocking.
  • Soft Buttons and other changes of tablets.
  • Toggle on sliding notifications.
  • Manager permits Android Apps .
  • Graphical improvements.

With all these advantages is more than obvious why is that CyanogenMod is one of the most famous in the scene and if you have a compatible smartphone with huge list of support having the group, especially a Samsung Android , you can certainly enjoy these advantages.

OmniROM

This particular is one that, although new, was born after the team CyanogenMod decided to become a private company and lost his fame as a rom open source, which reason that several independent developers who helped with Android Apps , Mods Android or Android Widgets , join and create this Rom.

It is so OmniROM for Android , with almost the same features of CyanogenMod , but with the addition of being open source and there are more developers who are helping to make it more popular and has more features in each nightly or stable release, what turns out to be more than good to install on your device option, taking some of the compatibility with smartphones / tablets most famous scene.

Paranoid Android

Another Android Roms to find the name of Paranoid Android is one of the least fame has in the scene between the three, but not one that is not that good. As striking point seems to be the ability to modify the aesthetics of the operating system at home and can easily change things as little absurd and influential as themes and colors. Although their main disadvantage also find the lack of development in the latest features and integrated applications, because unless they are a successful team of developers does not seem to give much importance as the other groups. But still a highly recommended to enjoy some visual customization oriented ROM.

Paranoid Android only officially supports the Google Nexus as Nexus 4, Nexus Nexus 7 and 10 , but can find no official support for other devices on XDA Forums.
How to install Android ROMs:
If you want to know if your device is compatible with any Rom and also how to install Roms on your Smartphone or tablet, just share the article.

How to install

Root + Custom Recovery :

If you have a media device or a high-end manufacturer like Samsung, LG, Sony Mobile, Motorola, HTC etc, you will not have many problems in power rootearlo and install a recovery.

The problem occurs in Chinese smartphones or tablets,copies of which are similar and whether the hardware is not, so the same process used in the original model does not support copy and have to resort to Several processes have access to super user and install a recovery.

To install a custom recovery the best options are:  ClockworkMod Recovery and TWRP Recovery .

How to fix Error 498 on Google Play Store-Solutions


Sometimes when we try to download apps from Google Play get unexpected errors that may have multiple causes.


One is the Error 498,which does not give many clues about its origin. Is summarized as " Error 498 has occurred while was communicating with the server." To resolve this error there are several ways, you have to keep trying until something works for you.

Method 1: Removing temporary data

Go to Settings (or options) >> Applications

  • Select "All" tab

Find Google Play Store

  • Remove Data
  • Clear Cache

Give back and now seeks Google Play Services

  • Remove Data
  • Clear Cache

Reboot your phone and try again to download your application

Method 2: Removing Gmail account

Go to Settings >> Accounts >> Google

  • Delete your Google account
  • Reboot your device

Login to Settings >> Accounts >> Google

  • Make your account again

Try again to download your application

Method 3: Using the Factory Reset

If neither of the first 2 methods worked, you can try to make a Factory Reset .

This is done as follows:

Login to Settings >> Backup and Restore

  • Factory Reset
  • Reset Device

Expect Android do its work, the phone will reboot.
Return to start

If any of these three methods will be served (or some other method), leave it in the comments.

Wassapp - An unofficial WhatsApp client for PC


Wassapp is an unofficial client WhatsApp for PC that lets you use the application messaging from a computer under Windows XP or higher. That is you can enjoy all the benefits that the popular app on the desktop of your computer without any problems.


Features Wassapp PC


  • Allows you to send and receive text messages from your PC
  • Allows adding contacts via Google or importing them manually.
  • Supports emojis emoticons and group chats.
  • Wassapp PC lets you send attachments with full efficiency.
  • You can display all types of content from the browser.
  • Gives notifications when new messages.
See also - How to install WhatsApp Messenger on an Android tablet

Using Wassapp on your PC

If you tenรฉ s registered in the WhatsApp application number will follow the process with a few steps. First you will indicate your location, country, phone number and IMEI then you continue with the step that will take you to chat with your friends with WhatsApp from PC.

To get the IMEI must follow the steps you will be dictating the program (in this case you do not know) When using Wassapp, the original app will disconnect the phone and vice versa, it is important to emphasize.

To download for PC Wassapp you're getting all the benefits of the number one tool when instant communication. Do not forget to install. NET Framework (4.0 at least) for the operation to a successful conclusion.

Download for Free PC Wassapp here
Developer : Lowlevel Studio.

OS : Windows 8(32 & 64 bit),Windows 7(32 & 64 bit),Windows Vista(32 & 64 bit),Windows XP(32bit)

Enjoy! If you want to tell us what you think let us comment on the blog or on social networks .

How to Update Nexus 4, 5, 7&10 to Kit Kat Android 4.4.2


The latest version of Android Kit Kat is with us but still has not received the OTA update for all Nexus devices . We will explain how to perform the update for Nexus 4 Nexus 5 , Nexus 7 both 2012 and 2013, and Nexus 10 without waiting for the OTA.

The update, as we discussed above, makes no wipe our devices so you can install them without fear of losing data or applications. The version number is Android 4.4.2 Kit Kat  since Google has done a couple reviews from the launch of Kit Kat the last day of October , condensed in the latter.

To manually update to Android 4.4.2 Nexus our Kit Kat have to follow a series of steps that will start downloading the corresponding file to your device and the version which we started:

Downloading the Android 4.4.2 version of Kit Kat

Nexus 4 from Kit Kat 4.4: 
Nexus 4 from Kit Kat 4.4.1:
Nexus 5 from Kit Kat 4.4:
Updated to Android 4.4.2 (KOT49H) from Android 4.4 (KRT16M)
Nexus 5 from Kit Kat 4.4.1: 
Updated to Android 4.4.2 (KOT49H) from Android 4.4.1 (KOT46E)
Nexus 7 WiFi 2012 from Kit Kat 4.4: 
Updated to Android 4.4.2 (KOT49H) from Android 4.4 (KRT16S)
Nexus 7 3G 2012 from Kit Kat 4.4: 
Updated to Android 4.4.2 (KOT49H) from Android 4.4 (KRT16S)
Nexus 7 2013 WiFi from Kit Kat 4.4: 
Updated to Android 4.4.2 (KOT49H) from Android 4.4 (KRT16S)
Nexus 7 2013 WiFi from Kit Kat 4.4.1: 
Updated to Android 4.4.2 (KOT49H) from Android 4.4.1 (KOT46E)
Nexus 7 LTE 2013 from Kit Kat 4.4: 
Updated to Android 4.4.2 (KOT49H) from Android 4.4 (KRT16S)
Nexus 7 LTE 2013 from Kit Kat 4.4.1:
Updated to Android 4.4.2 (KOT49H) from Android 4.4.1 (KOT46E)
Nexus 10 from Kit Kat 4.4:
Updated to Android 4.4.2 (KOT49H) from Android 4.4 (KRT16S)
Nexus 10 from Kit Kat 4.4.1:
Updated to Android 4.4.2 (KOT49H) from Android 4.4.1 (KOT46E)

How to upgrade to Android 4.4.2 Kit Kat

To upgrade we perform the following steps, with some prerequisites such as having the Android SDK properly installed and configured our device drivers. By now, we should follow the following process:
  1. We downloaded the file and store it in the folder Android SDK Platform-tools .
  2. Turned our Nexus and turn it on by pressing Volume Up + Volume Down + Power.
  3. Then press Volume Up until the option Recovery and press Power .
  4. We entered the mode Recovery .
  5. You should see an exclamation and then press Volume up, choose "apply update from adb" and we press On.
  6. We're going to prompt Windows or Mac.
  7. We type " adb sideload "or ". / adb sideload" to Mac , plus the name of. zip we downloaded and saved in platform-tools.
  8. We hope to complete the process and we will have our Nexus updated to Android 4.4.2 Kit Kat.
As we see, is a relatively simple and quick process that we can anticipate the OTA update Android 4.4.2 Google and Kit Kat have as soon as possible in our device. Being an official version of Android will not have any problem with the warranty.

How to Change iPhone iOS 7 icons without JailBreak


If you want to give a new touch to attractive icons iPhone with iOS 7, do not wait for time and knows how to change the icons. Just do not need jailbreak, so you just have you follow step by step process.

 I recommend you to decide which applications you want to change the icon and then look for the Google design. Once you have the picture you just have to keep the team on the reel and use it when you get to STEP 5. And without further ado you can follow the route:

CHANGING ICONS OF IPHONE WITH IOS 7  WITHOUT JAILBREAK

And in case you can not find appropriate icons, just in case we share a collection of icons painted like the image above. Then press this   link icons

STEP 1:

From your iPhone enters the web of iCustom .

STEP 2:

Once on the web you should find the button that says  Start Now and press.

STEP 3:

Now scroll down below to select the type of application, this is a filter so that the next step you access easily to the app that you plan to change the icon. In this case we chose the native iPhone Apps.

STEP 4:

Now you have selected the type of application, following the drop you must define the specific app you want to change.

STEP 5:

Then choose the photo you put as icon, in this case you can place a URL or select a photo of the reel, if you take into account the pre-processing board. Once ready, press the button Select File and then click the option Select existing or to choose the icon from your reel.

STEP 6:

Now that photo is selected scroll to the bottom and press the button Let's Go!

STEP 7:

The following table is loaded into the top of the screen, ready once the button Open Popup, as magically open a new page in Safari.

STEP 8:

The next page will redirect to the application that you selected, for it presses the button that says  add this page to your home screen.

STEP 9:

And finally, you have to add a name to the icon and press on  add. Now you just have to click on the icon you just created and will send the application in minutes. And presto!:)

NOTE:

It is noteworthy that the original icon is preserved, and if you want to delete, just put it in a folder and drag it somewhere on your SpringBoard.

Download Android kitkat 4.4.1 in Nexus 4 and Nexus 7


Yesterday Google released a new Android Kit Kat 4.4.1 update for the Nexus 5 on improvements in the camera .Today this update is also available for Nexus LTE 4 and Nexus 7 2013.


It seems that beyond Google polishing operation has focused on the photographic section in this update. The Nexus 5hrs improved camera but the rest also see developments since the default gallery application is Google Photos .

Updated to Android 4.4.1 Manual

If we update without waiting for OTA (over the air) version we can do so by downloading the files from these links and following the manual:


The steps after downloading the zip file to include:

  • Install Android SDK.
  • Copy the downloaded file in the Platform-tools of Android SDK folder.
  • We connect the mobile or tablet to your computer via USB.
  • We turn off the device.
  • Simultaneously press the Volume Down button, volume up and power.
  • We choose the Recovery option (the volume keys are to move and power to select).
  • Press Volume Up and Power when we see an exclamation.
  • Seleccionamons apply update from adb.
  • From the command window (or the terminal) we write the command adb and then sideload the update name

It's another step you are taking to control Google's Android ecosystem. We did not miss that future versions of the app gallery as it has disappeared browser.

Tutorial:How to Increase the volume of Nexus 5 without Root


The Brand new Google device, the Nexus 5 was released about 3 weeks ago and was met with acclaim, but within XDA Developers forums certain complaints that some devices have a low volume regarding your speaker.XDA devolapers solve the problem, and it fixed the problem and published a tips with all the necessary steps and tools in the process.


In this process you will have to open the device for carrying out this review. It's true Yes it is dangerous. But luckily, the steps are well documented and only need a few simple tools to carry out the review. Be very careful though. While the steps are well described and is relatively safe, after all, making a mod for the hardware,what could happen is that the device is damaged.

Tools:


  • 1 Phillips screwdriver 
  • 1 Case opener tool (screwdriver plastic cell)
  • 1 Guitar pick (tool with which a guitar is played)
  • 1 Lighter
  • 1 Needle

Steps:

1 - Remove the rear panel of the device and we remain as shown in the picture.


2 - Remove the 4 screws and carefully remove the lid that covers the audio output. As shown in the picture.


3 - Left only the lid and shown on image


4 - Heat the needle with the lighter

5- Punch Needle with hot parts that are framed with red in the following image, then move the needle around so I enlarged the hole and wait with the needle to cool.


6 - Once the needle has cooled twist and pull the needle out of the hole that was created.


7 - Make about 5 holes so that you have as well as shown in the following image.


Finally,re-set your device carefully.

That's it, leave any questions or suggestions in the comments.

How to recover accidentally deleted contacts in iPhone


We've all lost some of our phone contact either our or someone else's accident. How can we help? Is there any way to recover those contacts? Knowing how important it is to keep good records of all the people we meet in our lives, and we can not remember them all, this article will offer four tricks that, if you just accidentally delete these contacts have a chance to recover.


First of all, we must say that the best solution is to have a backup of your contacts, whether in iCloud , iTunes or any other service that allows us this task.

Restore a contact from the Contacts application on iCloud or OS X

For this we are going to enforce the latency or expected to have application synchronization with other devices. As we know, there are always a few seconds since we make any changes until this is reflected in other devices, so sometimes we complain about this, this time going to be our ally. This trick works with the application Contacts or Address Book or OS X version of iCloud.com . We must do the following:

Disconnect your iPhone once the network connection going into airplane mode so that we clear all connections.

  • Open the application Contacts in our OS X or iCloud.com and seek the deleted contact.
  • Open the contact, go to the menu >File> Export and then Export vCard to save the contact to a file . vcf . This support contact on our computer if the next step does not work.
  • With the selected contact, click on the arrow button Share and chose the "Send e-card" option to start the default email application with vCard contact attachment.
  • Disconnect airplane mode to receive our iPhone contact.
  • On the iPhone, open the message and selected attachment, select Create New Contact .

The reason to put the iPhone in airplane mode is for us to cut all connections and can not synchronize the accidental change that has been made ​​in contact with the network. If we are ahead of our Mac we can disconnect the network, so that synchronization does not arrive and we have a backup of those deleted contacts.

Retrieve contacts re-synced with iCloud

This option only re-syncs your contacts with iCloud, though not always work to restore lost contacts . But if the previous option is not successful, we can always try. Yes, we should be quick again before the changes are synchronized.

  • Open the configuration and we will iCloud .
  • We turned off the option Contacts .
  • Select Keep on the iPhone when you're asked to do with existing contacts.
  • We again turn on the option Contacts .
  • Select the option Merge , to mix the contacts we have with those in iCloud.
  • Let the application contacts to see if we have recovered the lost contact.
There are many applications available on the Internet to recover all your lost iPhone contacts but are third party applications that take advantage of desperate and usually charge high prices and no warranties.My recommendation is that you do not trust them because most are no more effective than manual methods described here. If the above not have been able to retrieve the contacts, I guarantee that there are few options for someone else does not have a previous copy.

Install WhatsApp Messenger on Apple iPad -Tutorial


WhatsApp is the one of the most popular smartphone apps in the world today . The instant messaging application has managed to conquer the hearts of the people and it is common that everyone wear this application installed on your smartphone.


WhatsApp not only allows us to send text messages to your contacts , it is also possible to send photos, videos, audio notes, contacts and even send our exact location in case your smartphone is capable of geolocation.

How to Install WhatsApp on iPad from a computer

If you prefer to install WhatsApp on iPad from a computer is possible. As you're imagining, to install the application need to use some software that can do this. Of course, iTunes will not allow it because it is a modified application, so you should use iFunBox , an interesting tool for installing software on iPad in a convenient way.

  • The first step is to download the modified version of WhatsApp to your computer.
  • Once downloaded, you must install the iFunBox application is available for both Mac and for Windows.
  • Open iFunBox application and select the option "Install App "located on the top bar, toward the center.
  • In the new window that is displayed, you must choose the WhatsApp application that you downloaded in the first point. The installation process will begin and will last just a few seconds.
  • Once called WhatsApp appear on the desktop of the iPad, but you should not run it. The next step is to access Cydia and install WhatsPad application.
  • Once installed WhatsPad, and can run WhatsApp and follow the steps on screen to activate the application.
To run WhatsApp on iPad you must have done the Jailbreak process . Therefore, WhatsApp will only work on iPad, iPad 2, iPad 3. Once the Jailbreak of iOS 6 is available, run WhatsApp on iPad 4 (iPad Retina), iPad Mini, iPad Air and iPad Mini Retina.

Do you have any doubt as to have WhatsApp on your iPad ? Ask in the comments!

Share this with your friends interesting resource on the major social networks to find the buttons to the top of the article. Thank you!

2 Easy Methods to Unlock Forgot Pattern & Passwords on Android


Forget the unlock pattern screen is a common problem when using Android phones (gesture to do with your finger to unlock the phone). This feature is great to see someone keep us moving without permission,but if we forget that some times.


Here is the best solution of the unlock or bypass problems

There are two Methods:

First Option

This method is functional when we know the pattern but someone entered wrong several times and we are now being asked is the google account. And it's the password for this account what we have.

  • Create a new Gmail account on the PC.
  • Call from another number to our cell.
  • Took down and press the Home key mobile.
  • Turn on the wifi if off.
  • Access the menu Settings -> Security and disable the unlock pattern. Yes i know we are not to use the second option.
  • Access the menu Settings -> Sync and add the Gmail account you just create us in the PC.
  • Turn off the phone.
  • Turn it on and introduce new Google Account

This method is only valid in some older versions of Android, so it is possible that the newer phones do not work. If this is the case should go to the menu  Storage -> . Restoring factory data This will erase everything on the phone but it would solve the problem.

Second Option

This method is harmful to mobile data, but is the only option to re-use if one method has failed. Just do not erase what you have on your microSD.

  • Turn off the phone.
  • Turn into recovery mode (by pressing the Volume Up, Home and Power simultaneously . If the mobile has physical call and hang up keys need to press green call key, Home and on at a time ).
  • Many new options appear in menu (move to do with the volume keys).
  • We chose the option WIPE DATA / FACTORY RESET.
  • When finished choose the option REBOOT SYSTEM NOW .
  • This will format the phone and left as it left the factory.

As we say the second option is like formatting a PC, we lose all that we had not saved in the microSD.

How to check activity log of Facebook on iPhone and iPad


This time you will learn how to check the activity log of Facebook from my iPhone or iPad in minutes. So do not wait any longer and you know all the details.


The activity log allows you to see everything you've commented, liked, uploaded, posted and among other details that meet after following the steps.

CHECKING THE ACTIVITY OF MY FACEBOOK LOG ON IPHONE AND IPAD

STEP 1:

Access the Facebook application from the home screen on your iPhone or iPad


STEP 2:

Then scroll to the bottom menu option and press the More (three lines icon)


STEP 3:

Now is the time to press on your name in the upper part to go to their profile.


STEP 4:

Below you will see all the blocks containing information (About, Friends, About, etc..) To do this you must move left and press on activity logs.


STEP 5:

In the next window you will see all your activity log .


FACT: In the activity log you can also display certain types of messages or events if desired.

As you can see the method is extremely simple and easy, so we hope we have helped you. Do not forget that if you have any questions do not get your comment at the bottom.

Galaxy S4 i9500, I9505: Install Official Android 4.3 Jelly been


As promised Samsung already leaked the official version of Android 4.3 Jelly Bean  for Samsung i9505 Galaxy S4 .


This update is expected by all users who purchased the current flagship of Samsung has begun to be released in Germany, which is expected to gradually reach to other countries via OTA or via Samsung Kies.

The new features from Android 4.3 for Galaxy GT-i9500 S4 and GT-I9505:

- Support for OpenGL 3.0
- Support for Galaxy Gear
- Supports TRIM (a tool that makes your device is more fluid)
- Support ANT +
- Implementation of Samsung KNOX (KNOX bootloader and application)
- Samsung Wallet comes pre-installed
- DIY consumption RAM
- Improved color reproduction on the display
- TouchWiz launcher Enhancements
- New Keyboard Samsung
- Samsung New web browser (full screen by default, new interface tabs, etc)
- New Mode Reading, it helps you read with more comfort by optimizing the screen just to read without interruption.
- New firmware for Camara
- Improved interface and performance of some apps such as Contacts, Widget Lantern, dialog etc

Details Official Firmware I9505XXUEMKE
  • Model:  GT-I9505
  • Country:  Germany
  • Version:  Android 4.3
  • Changelist:  2082040
  • Build date:  Wed, November 27, 2013 6:06:44 +0000
  • Product Code:  DBT
  • PDA:  I9505XXUEMKE
  • CSC:  I9505OXAEMKE
  • MODEM:  I9505XXUEMKE
  • Download:  I9505XXUEMKE_I9505OXAEMKE_DBT.zip
I9500XXUEMK8 firmware details:
  • Model:  GT-i9500
  • Country:  Russia
  • Version:  Android 4.3
  • Changelist:  2092849
  • Build date:  Thu, November 21, 2013 4:05:08 +0000
  • Product Code:  BE
  • PDA:  I9500XXUEMK8
  • CSC:  I9500SEREMK8
  • MODEM:  I9500XXUEMK8
  • Download :  I9500XXUEMK8_I9500SEREMK8_SER.zip
Warning:
If you intend to install this firmware not forget to make a nandroid or backup of your current rom or firmware so that you can restore in case you have problems.

To Backup your folder EFS

Steps to Install Official Android 4.3 on your S4 Galaxy i9500, i9505 .It is important that prior to you acutalizacion Boot your Galaxy S4 in recovery mode (Home + Power + Volume Up), and perform Wipe data and Wipe cache partition, to do a clean install and more Segura.

1 - Download and Run |  Odin3 v3.09.zip

2 - Turn off your Galaxy S4  in download mode (Home + Power + Volume Down)

3 - Connect your Smartphone to your PC and Odin will turn a yellow or blue color.

4 - In the field Odin brand AP and looking in the folder where you unzipped the downloaded firmware was: I9505XXUEMJ5_I9505OXAEMJ5_I9505XXUEMJ5_HOME.tar.md 5

 5 - You must be sure that the field Re-Partition no such marking.

6 - Click Start and wait until the new firmware is installed Jelly Bean 4.3 on your Galaxy S4 .

7 - Reboot and have Android 4.3 on your Galaxy S4 .

If you have some problems on startup, simply turn off your device and you should boot into recovery mode (Home + Power + Volume Up) and perform Wipe data and wipe cache partition.


Tutorial: Install Android 4.4 with Root in LG Optimus G (E975/E976/E977)


After being officially launched KitKat Android 4.4  is now available, the first fully functional ROM for the LG Optimus G  is compatible with the same models:  E975 / E976 / E977 . The only bug is found that does not operate the NFC making occasional. Otherwise everything works 100%.

If you want to Update your LG Optimus G to the latest version of  Android 4.4 KitKat  and do not want to wait any longer, here I leave the steps of the installation process.

Requirements:

1 - Make a Backup from the Recovery, if you do not like it you can return to your previous version without any problems.

2 - Have at least 50% of battery.

Steps to Install Android 4.4 on the LG Optimus G

1. Download the following files.


2 - Copy without decompressing the 4 files to the external memory of your device

3 - Turn off your device and then enter recovery mode

4 - Within a Recovery Make full wipes, Wipe data factory reset , Wipe cache partition and in  Advanced > wipe dalvik cache

5 - Go to Install zip from sdcard >  Choose zip > Wanted and flashed the Kernel

6 - Go to Choose zip > Selects the KitKat Android 4.4 Rom and flashed

7 - Go to Choose zip > Selects the Gapps Android 4.4 and flashed

8 - Go back to  Choose zip > Select the SuperSU and flash

9 - By Last go to Reboot system ,now to reboot your smartphone.

That's all you can have installed with Android 4.4 on your LG Optimus Root G .That's it, any questions or suggestions leave it in the Comments section.

[Tutorial] How to hide folders in Android easily


Privacy is one of the most precious things of Android devices , but with the increase in games Play Store some users are in the position to provide your devices with siblings, children or spouse, this causes a conflict when there are photos, Videos or audio we do not want to be public, that is why today we will show you an effective way to hide folders in Android without installing any software.


Hide folders is essential for those who seek to have more privacy since this method will detect any show or list the files it in this location. To carry out this method must follow the points below:

Steps by steps to hide folders


  • Download and install ES File Explorer
  • The program moves the files you want to hide a folder in common, this may be located anywhere.

  • When finished, go to the folder and press the button " New "
  • Write in the box ".nomedia "without quotes and hit accept.
  • Close all applications you are running and open the photo album, the folder should no longer appear.
  • If you have hidden audio player also sees your phone and check that this no longer.
  • Note: You can always see such photos or listen to the audio from the file browser.
To remove this restriction only comes into ES File Explorer and navigate to the folder, then click the Tools section of the active application the option to " Show hidden files "and delete the . nomedia you created, so you'll never change your files show.

Although there are some programs that do this work, it is recommended that you do manually because many programs installed or running unwanted functions and can damage your files.

How to get more volume of Android? Here the solution


Today we bring you an application that you can use to increase your Smartphone rings up to 40% and volume booster can download for android is totally free and with this tool you can make your smart phone to ring as a true professional media player.

Volume Booster Application


This great tool will help you in increasing the volume, it is simple and practical to use push of a button, reach enough sound, listening to perfection your favorite music, instantly! this app is completely free , so now it can use! Only you should download it to your mobile device! Done.
When download volume booster for android you can increase up to 40% the volume of your phone making it sound like a player professional multimedia, just deberas press the volume you want to achieve and let the same caliber application sound settings.

This new tool managed to improve the overall sound quality of your mobile phone.Besides, this application not only increases the sound of your speakers, as well also increases the volume of the headset when connected to the phone.

If you liked the post Download volume booster for android, we suggest you follow us by RSS Feed so you can order every day not only the latest news of android devices, but also best apps, tips and much more ...

Download Volume Booster Free